ServiceNow Integration
The ServiceNow integration enables Cloud ex Machina to automatically create and manage incidents, change requests, and other tickets in your ServiceNow instance, helping you track cost optimization opportunities, system issues, and custom workflows.
You need a ServiceNow instance with admin access to configure OAuth 2.0 Client Credentials authentication, which enables server-to-server connections without user interaction (e.g., automated ticket creation).
Prerequisites
Before configuring the ServiceNow integration, ensure you have:
- ServiceNow: Washington DC release (2024) or later for Client Credentials grant type support
- ServiceNow: Admin access to configure OAuth settings and system properties
- Cloud ex Machina: Admin access to your tenant
Creating OAuth 2.0 Client Credentials in ServiceNow
ServiceNow OAuth 2.0 Client Credentials is an authentication method designed for server-to-server integrations. It:
- Does not require user interaction or login screens
- Provides secure, token-based authentication
- Runs under a dedicated service account identity
- Is ideal for automated workflows like ticket creation
Step 1: Enable Client Credentials Grant Type
Client Credentials must be enabled at the instance level:
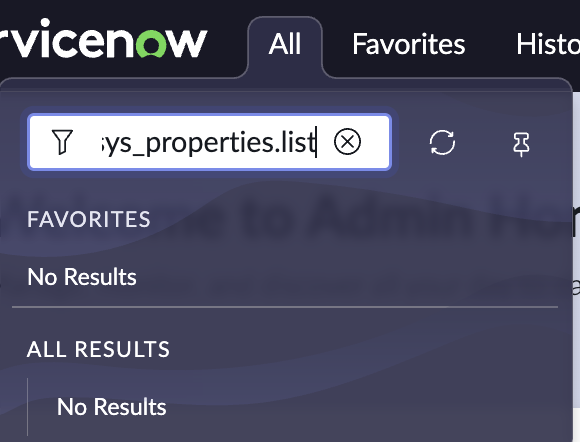
-
In ServiceNow, navigate to sys_properties.list (this won't appear under the "All" menu - type it in the navigation filter and press Enter to be redirected).
-
Search for
glide.oauth.inbound.client.credential.grant_type.enabled.
-
If it doesn't exist, click New and create it:
- Name:
glide.oauth.inbound.client.credential.grant_type.enabled - Type:
true | false - Value:
true
- Name:
-
Click Save.
Client Credentials grant type is only available in ServiceNow Washington DC release (2024) or later. If you're running an earlier version, you'll need to upgrade ServiceNow or use an alternative authentication method.
Step 2: Create an OAuth Application User
This is the service account identity that API calls will be made as:
- Navigate to User Administration > Users.
- Click New and configure:
- User ID:
cxm_integration(or your preferred name) - First name:
Cloud ex Machina - Active: Checked
- Web service access only: Checked (recommended)
- User ID:
- Click Submit.
- Open the newly created user and go to the Roles tab.
- Click Edit and add these roles:
rest_service- Required for REST API accessitil- Required for incident/change request creation- Add any additional roles required for your specific use case
- Click Save.
The "Web service access only" option prevents the service account from signing in through the UI, which is a security best practice for API-only accounts.
Step 3: Create an API Authentication Scope
- Navigate to System OAuth > REST API Auth Scope.
- Click New and configure:
- Name:
cxm_api_access - Active: Checked
- REST API:
Table APIor whichever API you need to target - REST API PATH:
now/table - Check: Apply auth scope to all HTTP methods in this API
- Name:
- Click Submit.
The Table API scope provides access to ServiceNow's standard table operations. If you need access to additional APIs (e.g., Import API, Attachment API), create additional scopes as needed.
Step 4: Create an OAuth Application
-
Navigate to System OAuth > Application Registry.
-
Click New > Create an OAuth API endpoint for external clients.
-
Important: The default form view doesn't show all required fields. To add them:
- Click on the burger icon next to "Application Registries"
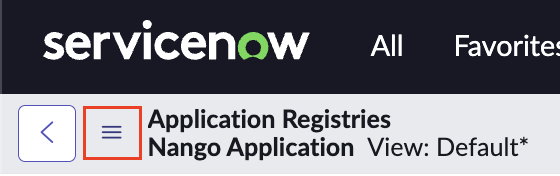
- Select Configure > Form Builder
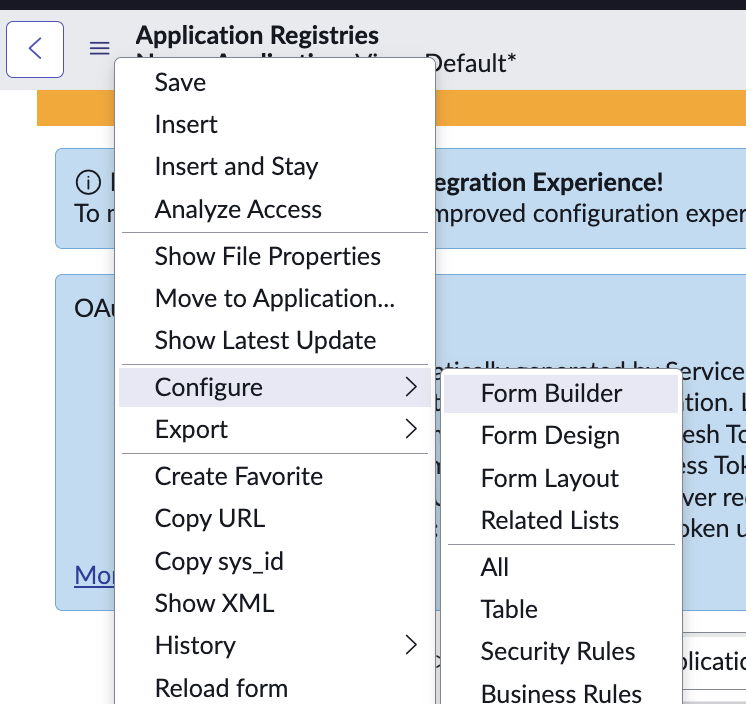
- Add the OAuth Application User and Default Grant Type fields to the form

- Save the form layout
- Click on the burger icon next to "Application Registries"
-
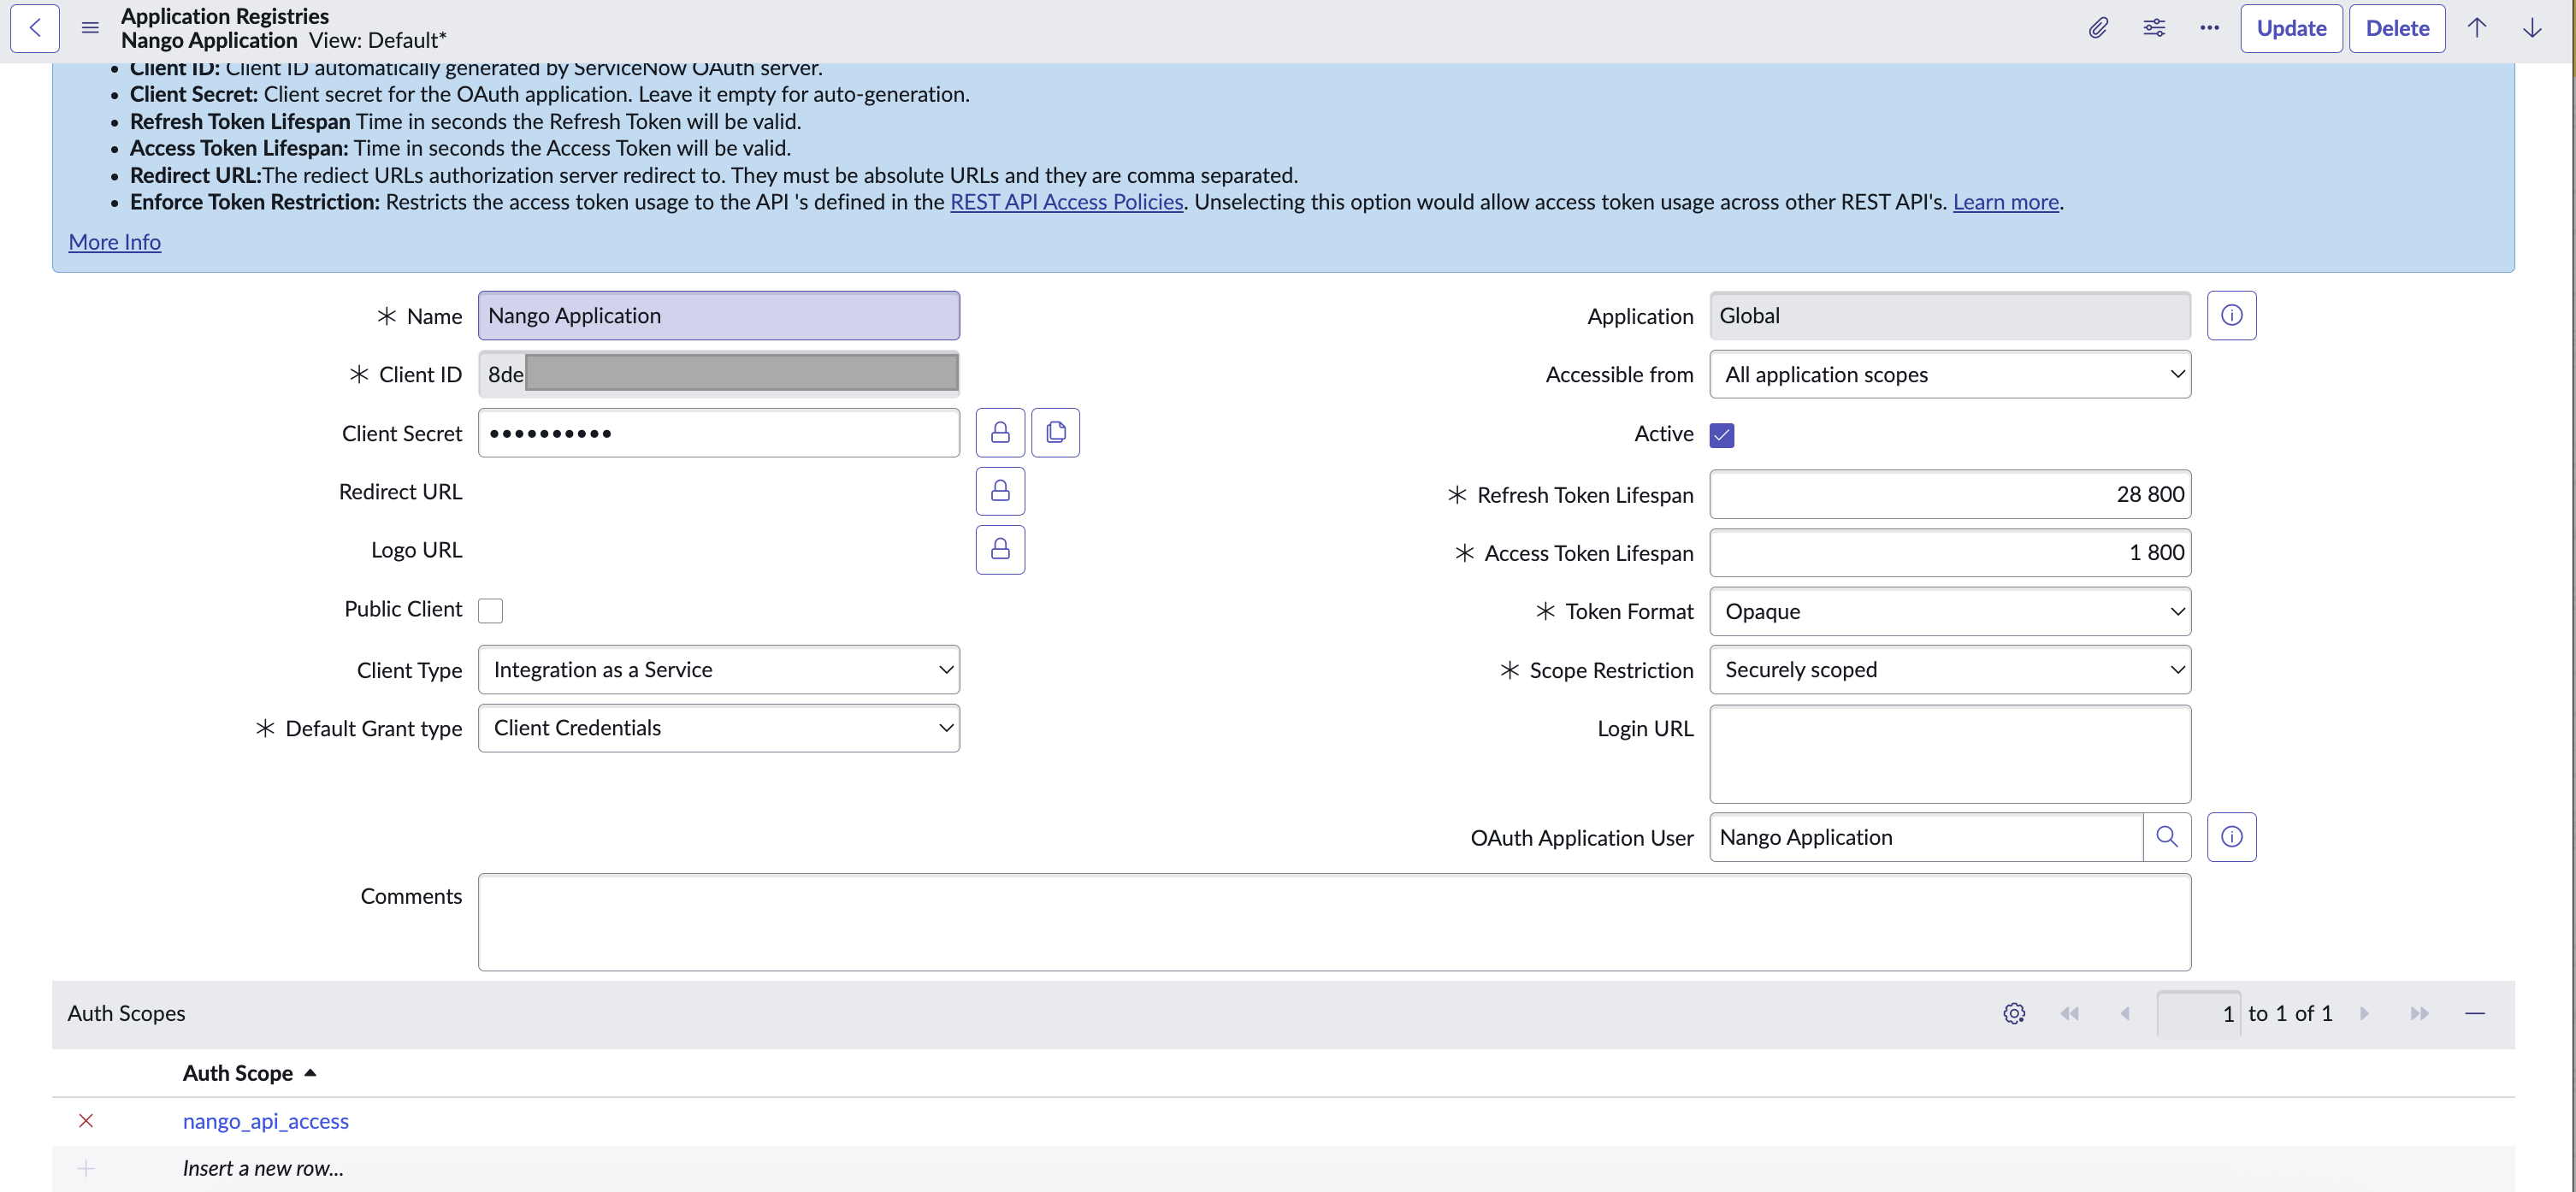
Configure the application:
- Name:
Cloud ex Machina Integration - Client ID: Auto-generated (copy this)
- Client Secret: Click the lock icon to reveal, then copy
- Default Grant Type:
Client Credentials - OAuth Application User: Select the user created in Step 2
- Active: Checked
- Name:
-
Click Submit.
-
Open the application and go to the Auth Scopes related list.
-
Click Add and select the scope created in Step 3.
-
Click Save.
The Client ID and Client Secret are displayed during application creation. Copy them immediately and store them securely in a password manager or secrets vault. The Client Secret cannot be retrieved later - if you lose it, you must generate a new one.
Configuring the Integration in Cloud ex Machina
Step 1: Navigate to Integrations
- Go to your Cloud ex Machina tenant
- Navigate to Settings > Integrations
- Find ServiceNow in the list of available integrations
- Click Connect
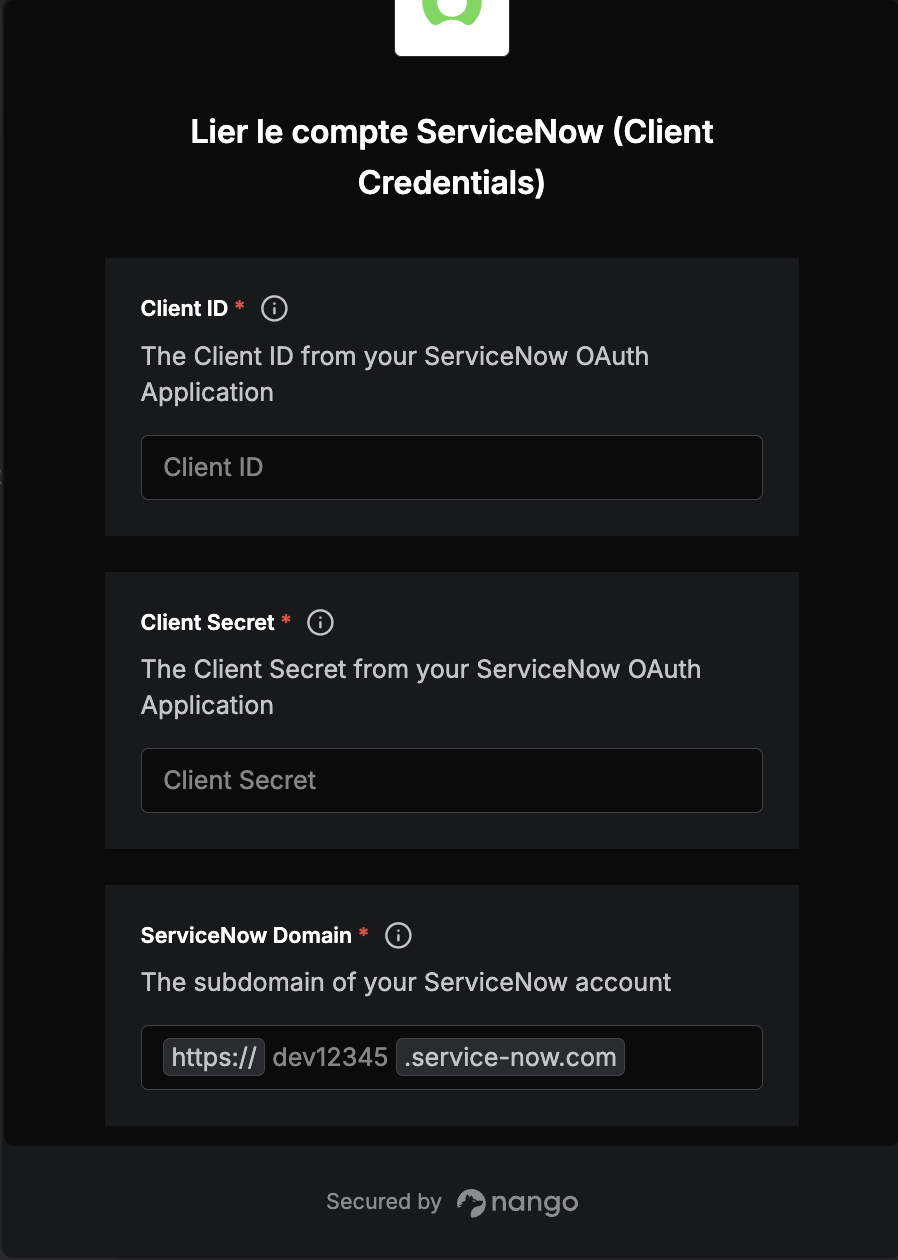
Step 2: Enter ServiceNow Configuration
In the integration settings dialog, provide:
- Subdomain: Your ServiceNow instance subdomain (e.g.,
dev12345fordev12345.service-now.com)- For ServiceNow.com instances: Enter only the subdomain (e.g.,
dev12345) - For on-premise instances: Enter your full instance URL
- For ServiceNow.com instances: Enter only the subdomain (e.g.,
- Client ID: The Client ID from the OAuth application you created
- Client Secret: The Client Secret from the OAuth application
Step 3: Save
- Click Test Connection to verify the configuration
- If successful, click Save to activate the integration
- Configure additional settings:
- Default Assignment Group: The ServiceNow group that will receive automated tickets
- Default Priority: The default priority level for created tickets
- Ticket Categories: Configure which types of events should create ServiceNow tickets
Troubleshooting
Integration Test Fails
Problem: Connection test fails when configuring the integration
Solutions:
- Verify the Client ID and Client Secret are copied correctly (no extra spaces)
- Ensure the OAuth application is marked as Active in ServiceNow
- Check that the OAuth application user has the required roles (
rest_service,itil) - Verify the auth scope is properly configured and linked to the OAuth application
- For on-premise instances, ensure the ServiceNow instance is accessible from Cloud ex Machina
- Check that Client Credentials grant type is enabled in system properties
Tickets Not Being Created
Problem: Integration is configured but tickets aren't appearing in ServiceNow
Solutions:
- Verify the OAuth application user still has access and hasn't been deactivated
- Check the OAuth application is still active
- Review the integration settings to ensure events are configured to trigger ticket creation
- Check Cloud ex Machina logs for any error messages
- Verify the assignment group specified in the integration exists in ServiceNow
Permission Errors
Problem: API calls return 403 Forbidden or permission denied errors
Solutions:
- Ensure the OAuth application user has all required roles for the operations being performed
- Verify the auth scope covers the APIs being accessed (e.g., Table API for incident creation)
- Check that the auth scope is properly linked to the OAuth application
- Review ServiceNow's ACL (Access Control List) configuration for the target tables
Token Errors
Problem: API calls return authentication or token errors
Solutions:
- Verify the Client ID and Client Secret are correct
- Check that the OAuth application hasn't been deactivated
- Ensure the Client Credentials grant type is enabled in system properties
- Try regenerating the Client Secret and updating the integration configuration
Security Best Practices
- Use dedicated service accounts with minimal required permissions for API access
- Store credentials securely in a password manager or secrets vault - never commit them to version control
- Enable "Web service access only" for service accounts to prevent UI login
- Limit auth scopes to only the APIs and operations required for your use case
- Monitor service account activity through ServiceNow's audit logs and user activity reports
- Rotate credentials regularly according to your security policies (e.g., every 90 days)
- Review permissions quarterly to ensure they remain appropriate and minimal
- Use IP allowlisting in ServiceNow to restrict API access to known Cloud ex Machina IP addresses
- Enable multi-factor authentication for admin accounts that configure OAuth applications
- Document service account ownership so multiple admins can manage it
Next Steps
- Learn about other available integrations in Integrations Overview
- Configure additional providers to centralize your workflows
- Set up notification rules to control when ServiceNow tickets are created